
BIND DNS Server on a Local Network: Part 3
Getting the web server ready for BIND
disclaimer
posted: 2020-07-17 | updated: 2020-08-15
![]() page 2 of 4
page 2 of 4 ![]()

Step 2:Create test websites
In this step we’ll start by adding an index page to the web server’s document root. Next we’ll setup three test websites. Sample files are provided.
-
Add an index page to the document root
While you can ping a mobile device from the web server, you can’t (normally) ping the web server from a mobile device, so how do we know if the mobile device can “see” the web server? Adding a simple HTML index file to the web server’s document root is a handy way to test your web server and local network configuration.
Assuming the web server and local network are configured correctly, both mobile and non‑mobile devices can display an index, or other page, without virtual hosts, hosts file entries, or a local DNS server.
Click index.html.txt and save the index page as
C:\webserver\apache\htdocs\index.html
To view the page, start the web server then enter the development web server’s IP address, 192.168.0.200, in the browser of each of your devices. You can also use localhost from the development server. If the index page displays on all your devices, congratulations! Pat yourself on the back and proceed to the next step. If not, paradise must be regained en.wikipedia.org/wiki/Paradise_Regained. At this point you can rule out problems with Virtual Hosts and the DNS server as they haven’t entered the picture yet.
If you have an existing index page in your document root that you don’t want to replace, use a different file name, such as:
myindex.html
and access it from a browser like this:
192.168.0.200/myindex.html
I should point out that the links on the provided index page won’t work yet, but we’ll get to that soon.

Note: When you enter a local domain name into a mobile browser, it will not display the website. What the fluff! Instead, it will search the internet, but of course your local domains don’t exist there. You can get around this problem by using an index page with links to all your local domains as suggested above.
Want to make your life easier? Make a shortcut on your home screen to your development server’s IP address, you’ll be glad you did.
-
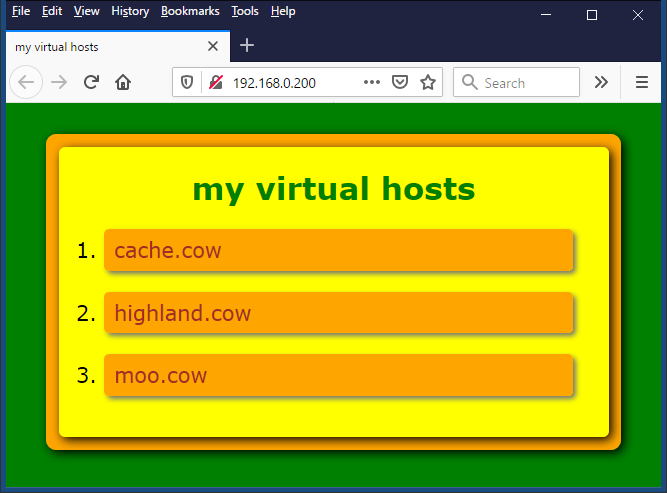
Create test websites
I’ve provided an absolutely scintillating PHP file which can be used for each of the three test web sites. The page heading and colors change depending on the local domain the file is used with—sort of like a mood (mooed?) ring—so you’ll know which site you’re visiting. There is also an accompanying style sheet.
-
Make a new folder, test_sites, in the document root:
C:\webserver\apache\htdocs\test_sites
-
Make a subfolder for each of the test websites:
C:\webserver\apache\htdocs\test_sites\cache_cow
C:\webserver\apache\htdocs\test_sites\moo_cow
C:\webserver\apache\htdocs\test_sites\highland_cow
- Click index.php.txt and save the page as index.php in each of the test site directories above. Click styles.css.txt and save the page as styles.css in each of test site directories above. You should now have a copy of index.php and styles.css in each of the three test site directories.
-
Step 3:Add virtual hosts for test websites to the development server
In this step we’ll create virtual hosts for localhost, and the three test websites: cache.cow, moo.cow, and highland.cow. Here’s an example of the virtual host for the cache.cow test site:
# Virtual Server for test site: cache.cow
# Project: How to Set Up BIND DNS Server on a Local Network
<VirtualHost 192.168.0.200:80>
    DocumentRoot C:/webserver/apache/htdocs/test_sites/cache_cow
    ServerName cache.cow
</VirtualHost>
Pretty simple, right?
-
Include the virtual hosts configuration file
Open C:\webserver\apache\htdocs\conf\httpd.conf in a text editor. Find this line:
#Include conf/extra/httpd-vhosts.conf
Uncomment the line by removing the pound (#) symbol so it looks like this:
Include conf/extra/httpd-vhosts.conf
Save the file.
-
Create a Virtual Hosts file for the test websites
-
Make a copy of the Apache virtual hosts configuration file:
C:\webserver\apache\conf\extra\httpd-vhosts.conf
Save it as something like:
httpd-vhosts.conf.original
Click http-vhosts.conf.txt and save the file as:
C:\webserver\apache\conf\extra\httpd-vhosts.conf
Edit the IP addresses and paths to match your configuration. Save the file and restart Apache for the changes to take effect.
-
Check for virtual host syntax errors
At the command prompt, type:
C:\>httpd -tPress Enter.
Another useful command is:
httpd -t -D DUMP_VHOSTS
As well as checking the syntax of all Apache configuration files, it lists the virtual hosts and their port numbers (virtual hosts are not displayed if there is an error). Visit httpd.apache.org/docs/2.4/programs/httpd.html for more information on httpd options.
-
![]() page 2 of 4
page 2 of 4 ![]()
No comments yet…