
BIND DNS Server on a Local Network: Part 5
Installing and Configuring BIND
disclaimer
posted: 2020-07-17 | updated: 2020-10-26
![]() page 6 of 6
page 6 of 6 ![]()

Step 10: Starting BIND for the first time
-
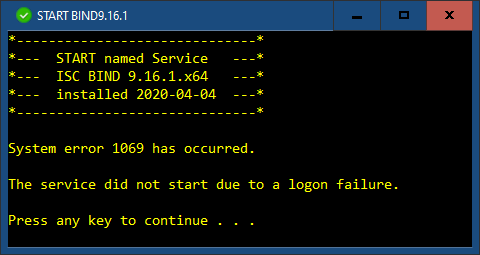
This is where you hold your breath and click your brand new START BIND shortcut. If BIND starts without a hiccup, congratulate yourself.

-
ZoneAlarm Program Control Settings
-
A few seconds after starting the BIND’s named server, a ZoneAlarm Server Program pop-up will warn you that “named.exe wants to accept connections from the trusted zone.” Check the Remember this setting check box, and click Allow.

ZoneAlarm’s Application Control Settings now allows named.exe to access the Inbound and Outbound Trusted zones (the local network):
Smart Defence Auto Trust Level ? Outbound Trusted ✓ Outbound Internet ? Inbound Trusted ✓ Inbound Internet ? -
Shortly after, a ZoneAlarm pop-up will warn you that “named.exe is trying to access the Internet.” Check the Remember this setting check box, and click Deny. (The first time a new program starts, the New Program pop-up appears. In this case named.exe has been run before, hence the Repeat Program pop-up.)

ZoneAlarm’s Application Control Settings now block named.exe from accessing Inbound and Outbound Internet zones (connections with the Internet). And this is what we want for a DNS server running on our local network. named.exe should now have the following settings:
Smart Defence Auto Trust Level ? Outbound Trusted ✓ Outbound Internet X Inbound Trusted ✓ Inbound Internet X
-
-
Manually applying Zone Alarm Application Control Settings
There will be times when you’ll need to manually set Application Control Settings for named.exe or other programs. Here’s how:
- Open the ZoneAlarm client, Click the Antivirus & Firewall panel
- In the Antivirus & Firewall tab, click Settings in the Application Control section
- Click the View Programs button to display Application Control Settings window
- Scroll down the list of programs to named.exe
-
To make changes, click on a setting, then click the desired option from the pop-up menu.

- Click OK and close the ZoneAlarm monitor.
Resource:
Earlier it was noted that the etc folder, locate here: C:\webserver\bind\etc, was initially empty. During the configuration, two files were added: named.conf and rdnc.key. Each time BIND starts, it creates two more files in the etc folder: named.pid—containing a Windows process identifier for named.exe, and session.key—containing a transaction signature (TSIG) used to authenticate local Dynamic DNS update requests submitted via the nsupdate tool. The nsupdate tool is not covered in this article.
Step 11: Test your local websites
With your development web server and BIND up and running, see if you can access all the test websites using their local domain names. Try this first from the development server itself, and then from all the devices connected to your local network. If cache.cow, highland.cow, and moo.cow spring forth from the browser of your mobile and non-mobile devices, immediately backup all web server software, including BIND, brew a nice pot of rosehip tea (well, maybe not rosehip), and call all your friends.
Step 12: When BIND won’t start
-
Configuration errors
Syntax errors in named.conf, and files included in it with the include statement, will prevent BIND from starting, so check these first.
- Use the named-checkconf tool to check for syntax errors in named.conf. Use named-checkconf with the -z to check the zone files. Normally, you’d want to check BIND’s logs, but BIND can’t write to its log files until after it’s started.
-
Check for Application errors with the Windows Event Viewer
-
To open the Event Viewer, at the command prompt, type:
C:\>eventvwr.mscPress Enter.
- In the left pane, expand Windows Logs then click Application
- Look for errors where named is listed in the Source column
- Double-click the errors for details
-
-
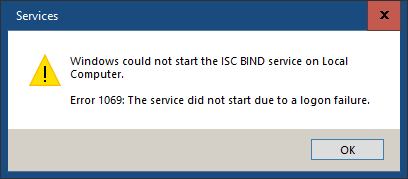
Logon Failures
It’s possible that BIND won’t start because of a logon failure. This happened when I updated BIND. While installing the new version, I’d given the named service account a new password—this does not overwrite the existing password. Even updating the password in the services console makes no difference.
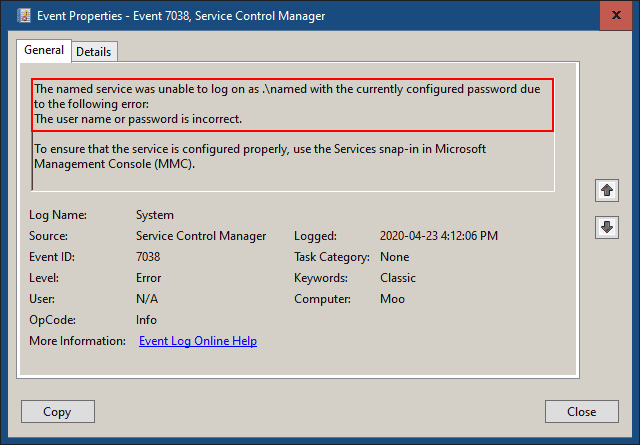
Open the Event Viewer. In the left pane, expand Windows Logs and select System. Take a look at the latest errors.

Bad password confirmed:
There are two things you can try if you have a logon failure:
- Run the named service using the Local System account, a temporary measure
- Change the named user account password
-
Running the named service with the Windows Local System account
Before Chicken Little announces that the sky is falling, running named using the Local System account has security implications: the Local System account has “complete unrestricted access to local resources.” docs.microsoft.com/en-us/windows/desktop/ad/the-localsystem-account, which is not what we want.
If the named service is unable to log on as the .\named user, you can try using the Local System account which does not require a password. If BIND starts normally, you can point a long, boney finger at the named account and perhaps utter a cackle or two; you'll know that the problem is most likely with the named user account and not your configuration.
A note of bother: Selecting the Local System account turns the named user account name and password into a pumpkin. Make sure to have them handy, because you will have to reenter them when switching from the Local System account back to the named user account.
-
At the command prompt, type:
C:\>services.mscPress Enter.
- Find ISC BIND in the Name column of the list of services, double-click it
-
Select the Log On tab

Write down the account name, it’s about to disappear
-
Click the radio button beside Local System account, press OK. Restart the named service for the change to take effect.

-
-
Changing the named user account password
Changing the named user password (should) fix the logon failure, but there is a catch. While you can enter a “different” password for the named account in the services console, it won't actually change the named user account password. What? It's true. Time to head over to the Computer Management snap-in in the Microsoft Management Console:
-
At the command prompt, type:
C:\>compmgmt.mscPress Enter.
-
In the left pane, expand Local User and Groups, select Users
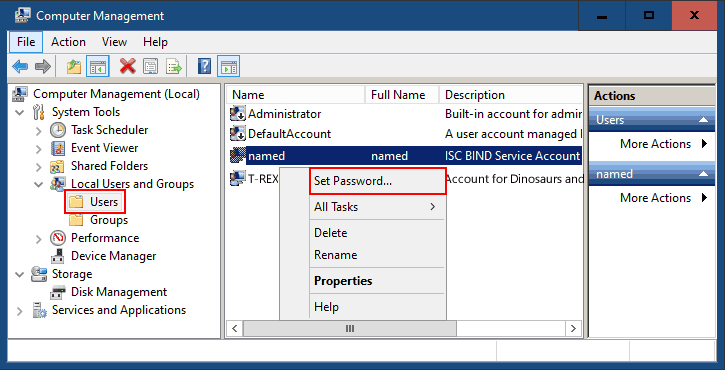
- Right click the named user, then click Set Password from the pop-up
-
Read the dire warning, mop beads of sweat from your brow, then gingerly click the Proceed button

-
Read yet another dire warning, then maybe decide it’s all too scary and take a nap…or take the risk and enter a new password, enter the password again to confirm, and click OK

Click OK again and you’re done.

-
Change the named service password to the new password
-
At the command prompt, type:
C:\>services.mscPress Enter.
- In the Services (Local) pane, locate ISC BIND in the Name column. Double-click the service.
-
Select the Log On tab, type the new password created in step 2.2.5 above, confirm the password, click OK. Restart the named service
If you were temporarily using the Local System account to troubleshoot BIND, before you can enter the new password, you’ll need to select the radio button beside This account and type .\named in the account name field.

-
-
Step 13: Troubleshooting BIND
I hesitated to add this section for fear of raising false hopes, yet here it is…
- Work methodically. Test, test, and test again.
- When things seem hopeless, take a break, and then ask yourself, is this a development server problem, a network problem, a firewall problem, or a BIND problem? Proceed from there.
- Do the easiest things first, example: I often have to restart my smartphone before it will connect to the local network.
- Get the development server working first. If you can’t serve webpages using hosts file entries, remove BIND from the picture until you can.
- Check ZoneAlarm settings: the firewall should be set to medium for the Trusted Zone. Application Control settings for named.exe should be set to Allow for the Inbound and Outbound Trusted zone.
- If you’re daring, you can rule out ZoneAlarm firewall setting woes by momentarily “snoozing” the firewall. Disconnect the router from the Internet before trying this.
- Check the Windows Event Viewer, ZoneAlarm and BIND logs.
- Use BIND’s testing tools such as named-checkconf
- When things work, note configuration settings and backup everything. This includes your development server, BIND, router, and firewall settings, and your dog. Well, maybe not your dog.
- Repeat this mantra: “I can make this work!”
Okay, that’s it. That’s all I’ve got. The web is your oyster. Go forth and test pages.
![]() page 6 of 6
page 6 of 6 ![]()
No comments yet…